
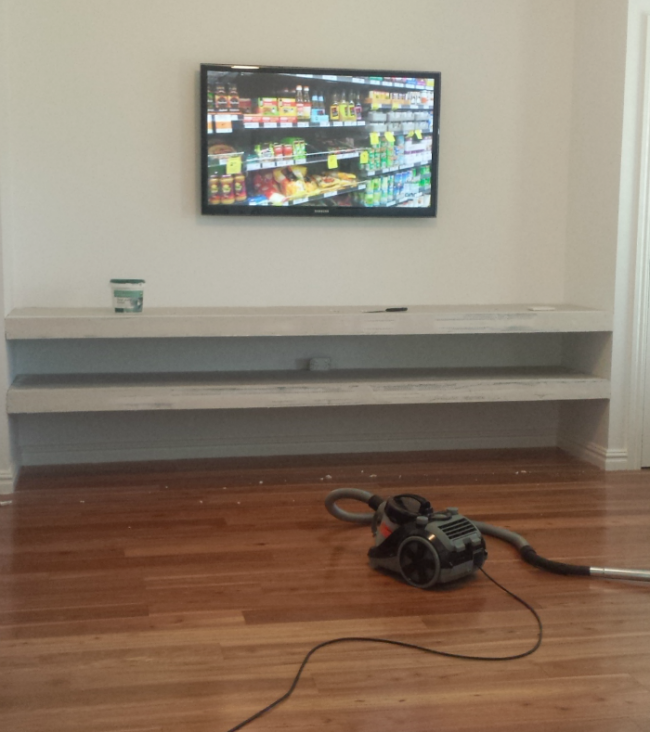
You know I love a DIY and these floating shelves under a tv have to be one of my favourites. I published this post back in 2014 originally, but the room has changed with the styling a little bit over time and I thought I might freshen it up and show you this project again. I still love these shelves! They weren’t hard to do.
HERE’S WHAT I WANTED TO DO
• I needed 2 big floating shelves under a tv area between 2 storage cupboards.
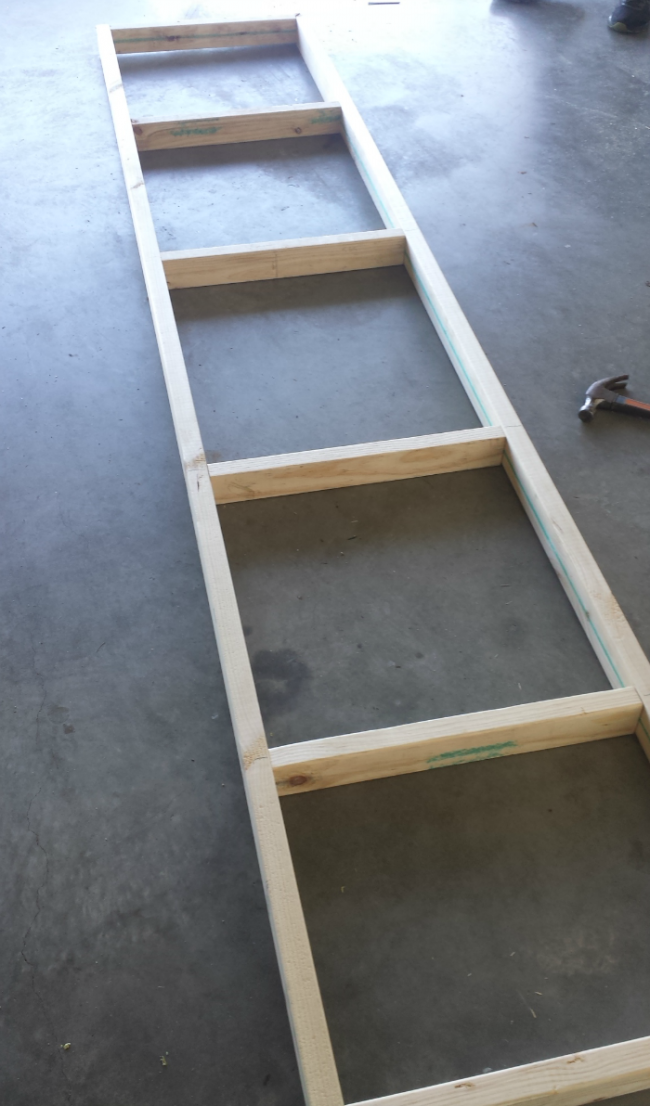
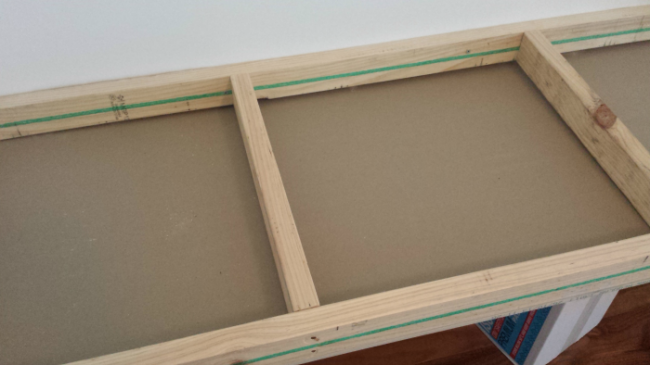
• I wanted to make a frame to sit inside the space, and plaster (gyprock) the entire frame. This would mean square setting the corners.
• The frame/plaster idea would give me the width and length I required, plus be easy to mount to the wall and I would not need any brackets. I had my builder do this in another part of my home when we built it, so I knew it was doable. The tv cords will go in the wall cavity (I did have a power-point put down low in anticipation of these shelves).
ARE YOU WITH ME? OK, LET’S SEE THE PROGRESS PHOTOS BELOW…
WE BOUGHT
– Timber for the frame
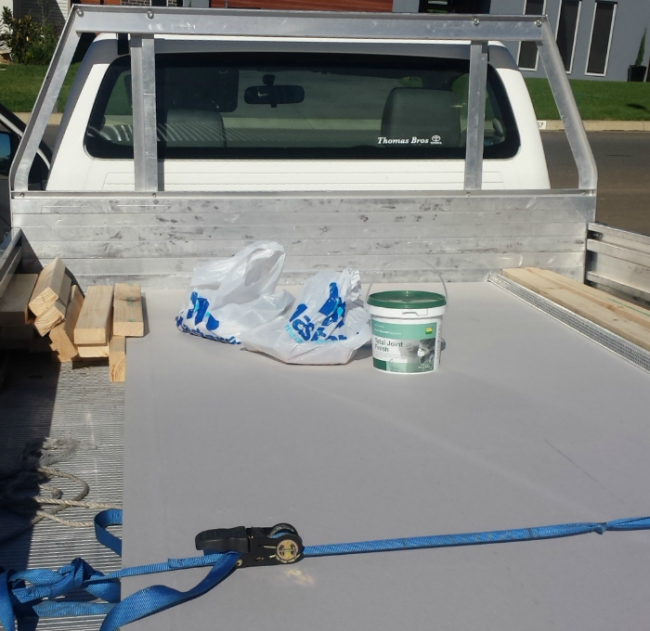
– Plaster sheets
– External corners for the plaster
– Plaster cement
– Screws, nails
– Sanding block
– Paint
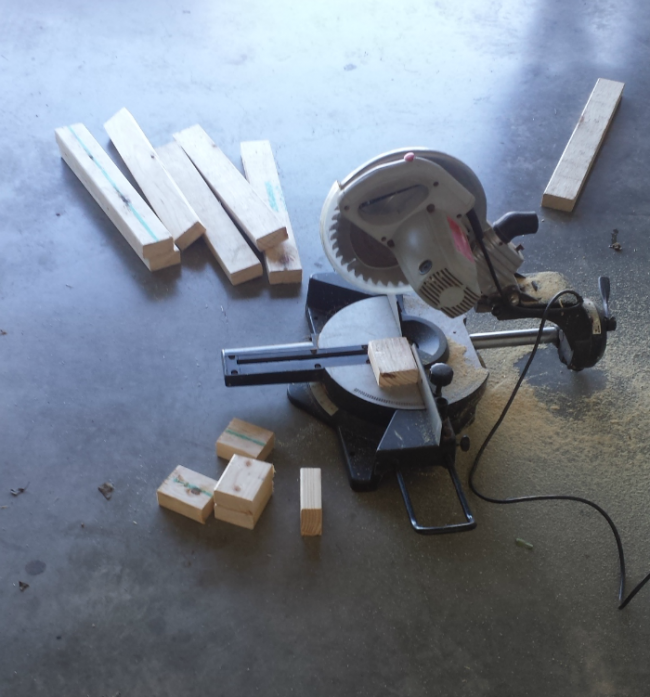
The hardware store pre-cut all our long pieces of timber for the outside part of the frame. We kept the off-cuts and cut those to size when we got home. So, just take your measurements to the store if you don’t have the tools to cut yourself – they’ll do it all for you!
TIP!
You must put the bottom piece of plaster on before you mount the flosting shelves to the wall or you’ll never get it on. Just use your frame to lay on the plaster and score it with a knife and break the plaster off. This is really easy. It doesn’t matter if the edges are a little ratty because you’re going to plaster them. Just nail the plaster to the frame.
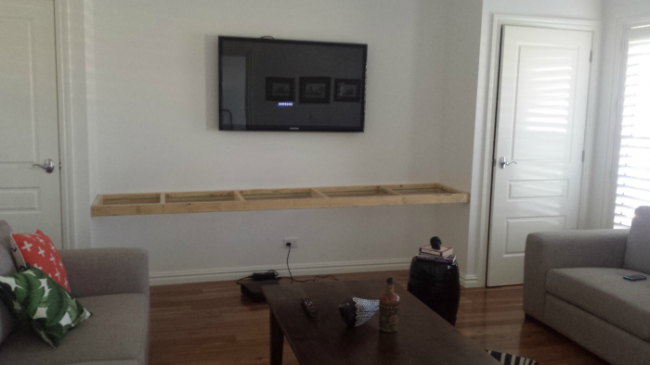
We have a stud-finder so when it came to mounting the frame into the wall, we obviously found the studs and hit the frame into those.
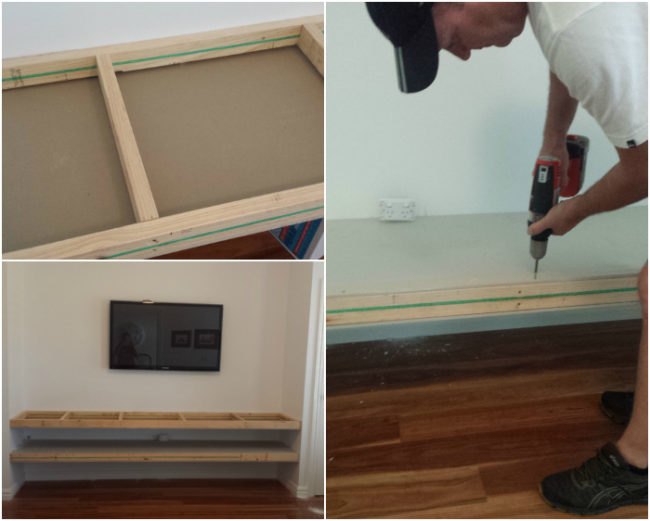
As you can see in the above photos, we put the top piece of plaster on before we mounted the top shelf.

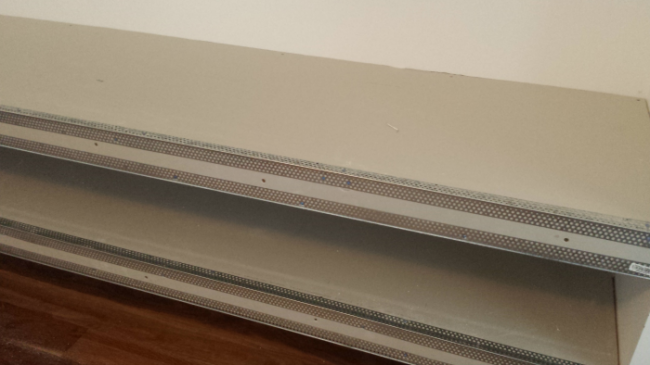
On go the external corner brackets. They were really long, so we used a pair of tin snips to cut them to size. They are then just nailed into the plaster. This will give you a nice neat edge!
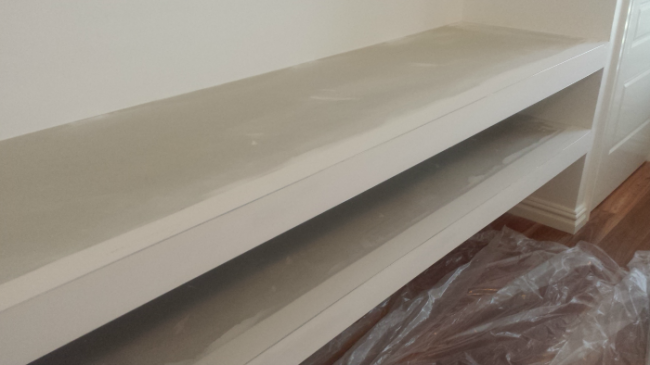
… And here are the shelves after they’ve had the plaster troweled on. I must admit I got out of doing this part! My husband wouldn’t let me near it haha! He is a perfectionist so I let him do this quietly on his own. We did NOT hire a plasterer! Truly, it wasn’t hard… just a bit of patience and take your time smoothing it on. It had about 3 coats. So the first one was a light coat and then it got thicker until you couldn’t see the external metal corners. Then it got a light sand so it felt smooth and was ready to paint.
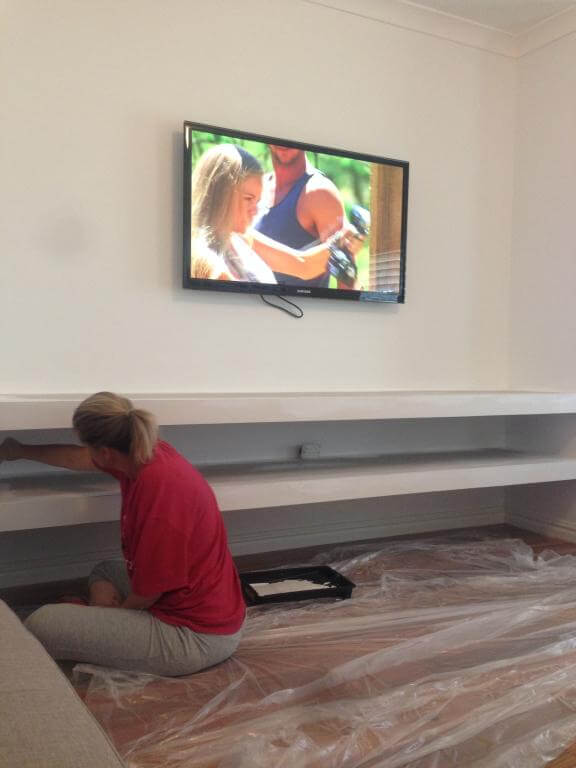
Now I switched back into gear and got busy painting it! We all argued in our house about which type of paint to use, but we ended up going with the flat white (to match the walls and make it look seamless). I originally wanted to do them in a semi-gloss but my husband didn’t want to. Haha! He won on this one!
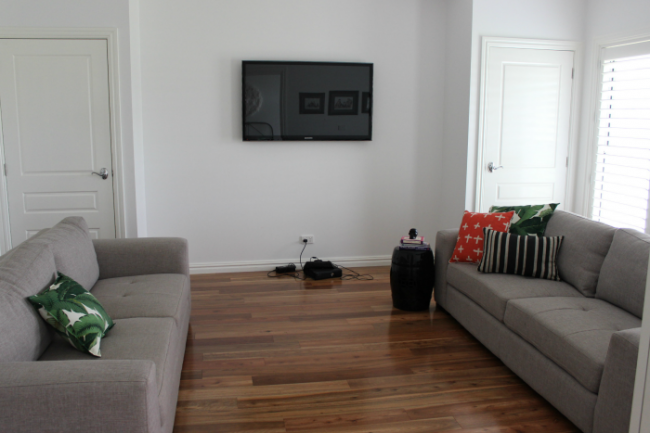
Here’s the finished job – DIY floating shleves!


Everything is seamless, no messy cords and everything is run off wi-fi these days. Kids do come in here to play the Xbox occasionally. In the cupboards I store all the lego and random things. Can never have enough storage. And if you follow my Instagram you’ll know that this room is Bear’s favourite too because he is always asleep on that lounge in a contorted position!
Have you made your own shelves?
♥ KC.